
- Notebook: Django: Automating Common Tasks
- Speaker: Udemy Instructor Rathan Kumar
- Date Created: Aug. 14, 2024, 1:54 a.m.
- Owner: Rosilie
1. After we installed, set up, and tested our Celery and Redis, it is time to use this on our IMPORTDATA function.
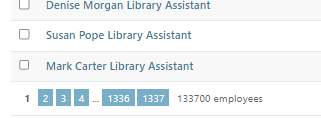
2. Our PROBLEM is that when we import large data like ONE MILLION records of employees, it may take some time (after testing it, it took at least 13 minutes long to save only 130K records, so it might take longer to save all the 1M records.). Our SOLUTION is to use the CELERY function to handle this time-consuming process while we see messages like 'Your data have been saved successfully' and you can do other things.
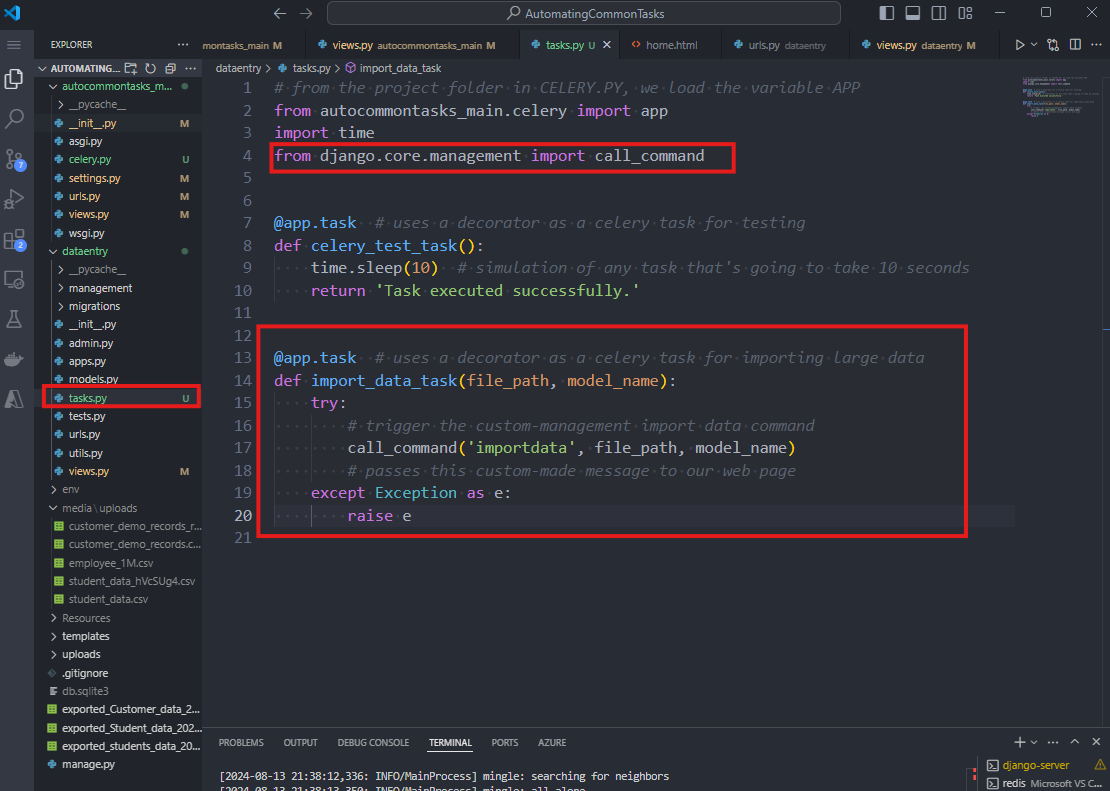
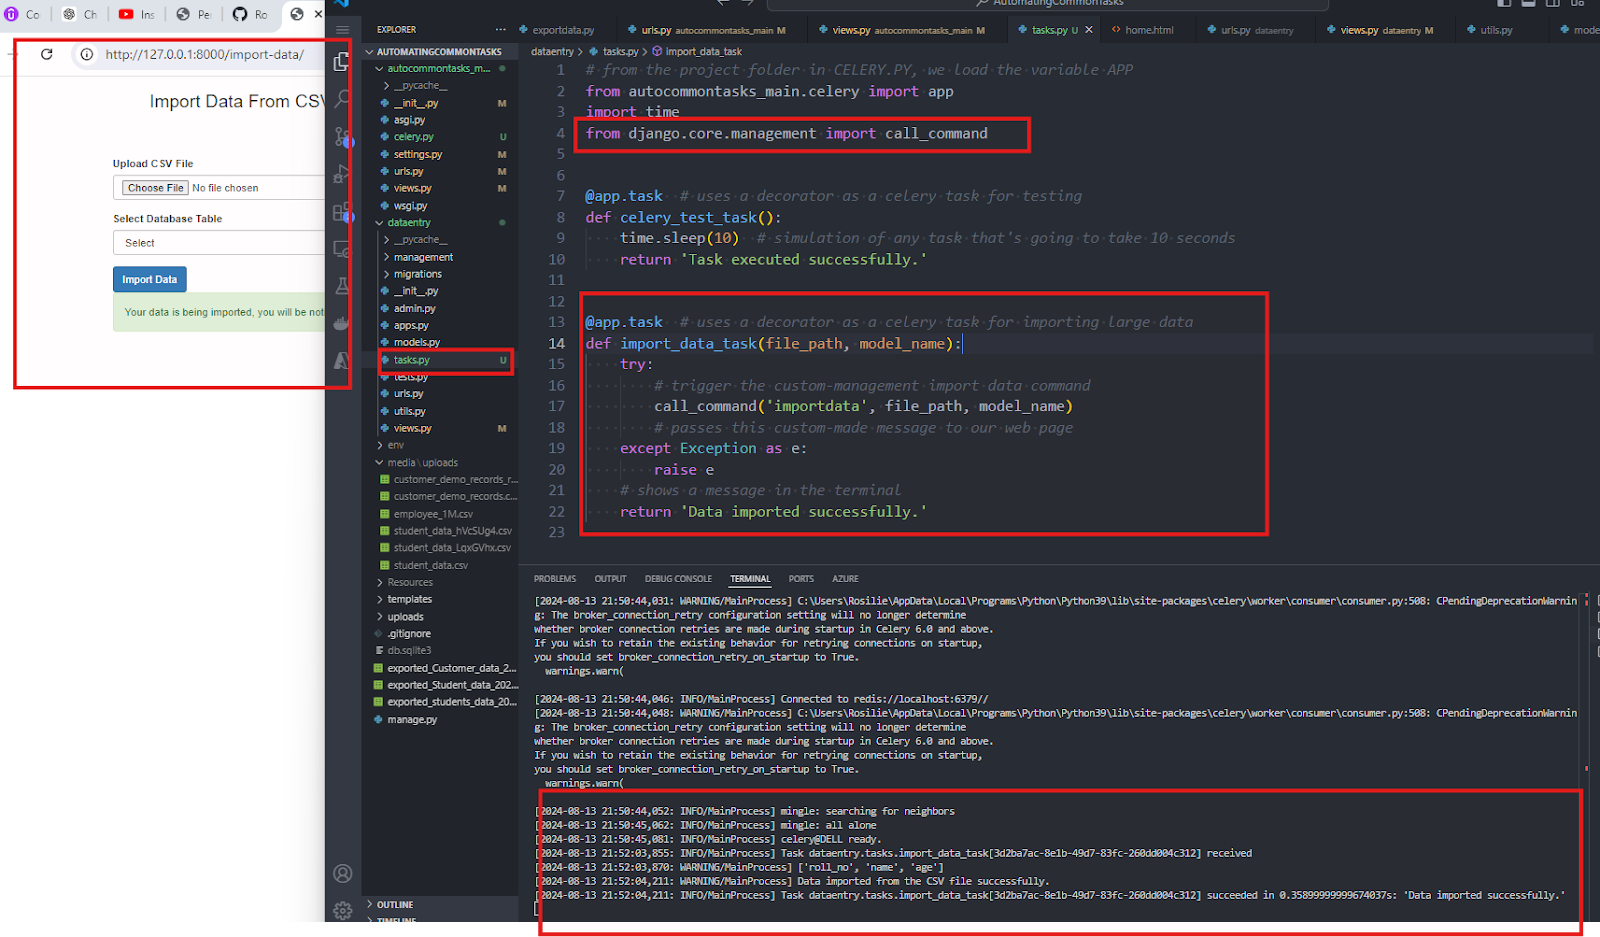
3. We create a new CELERY function in our DATAENTRY\TASKS.PY and update as:
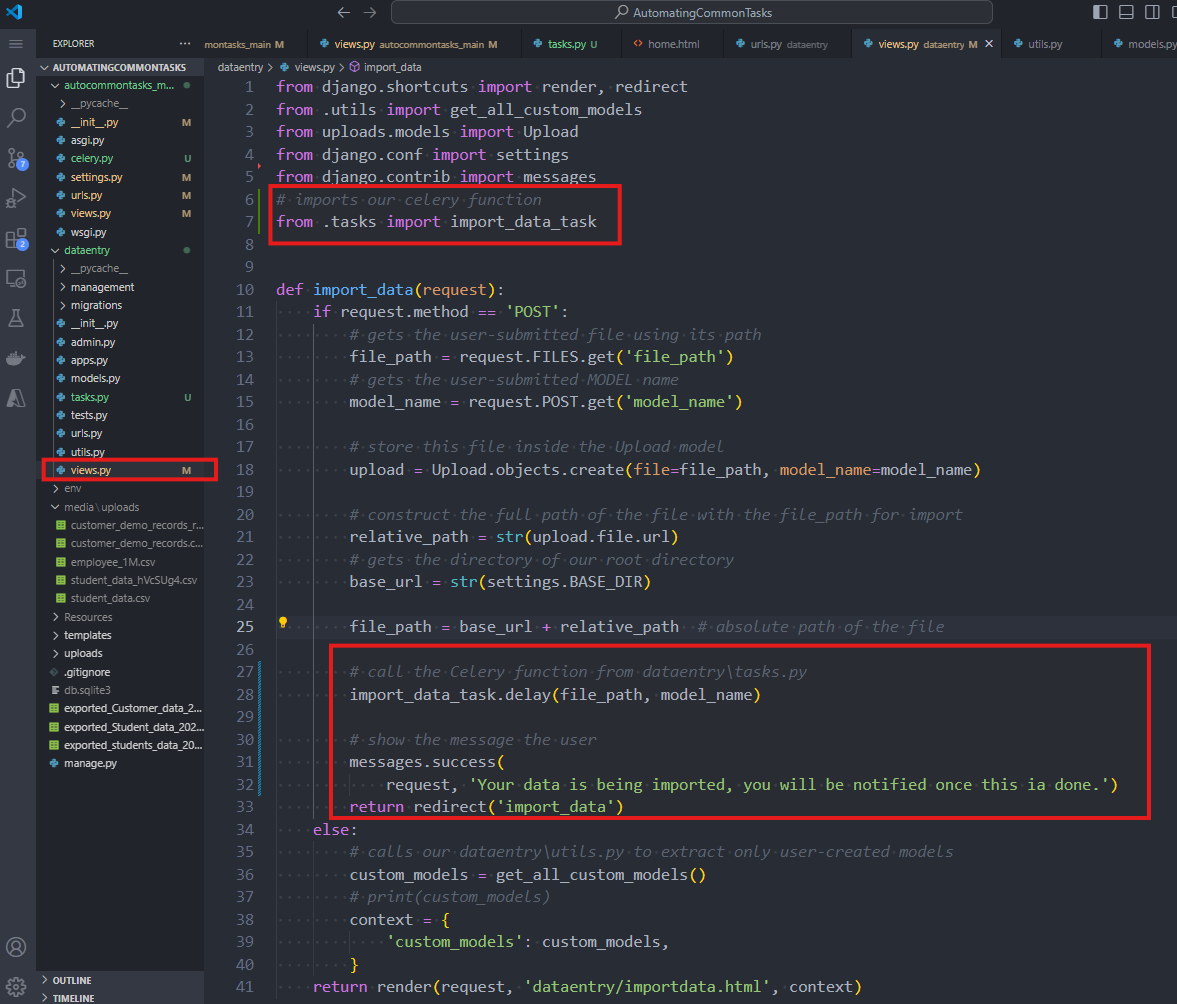
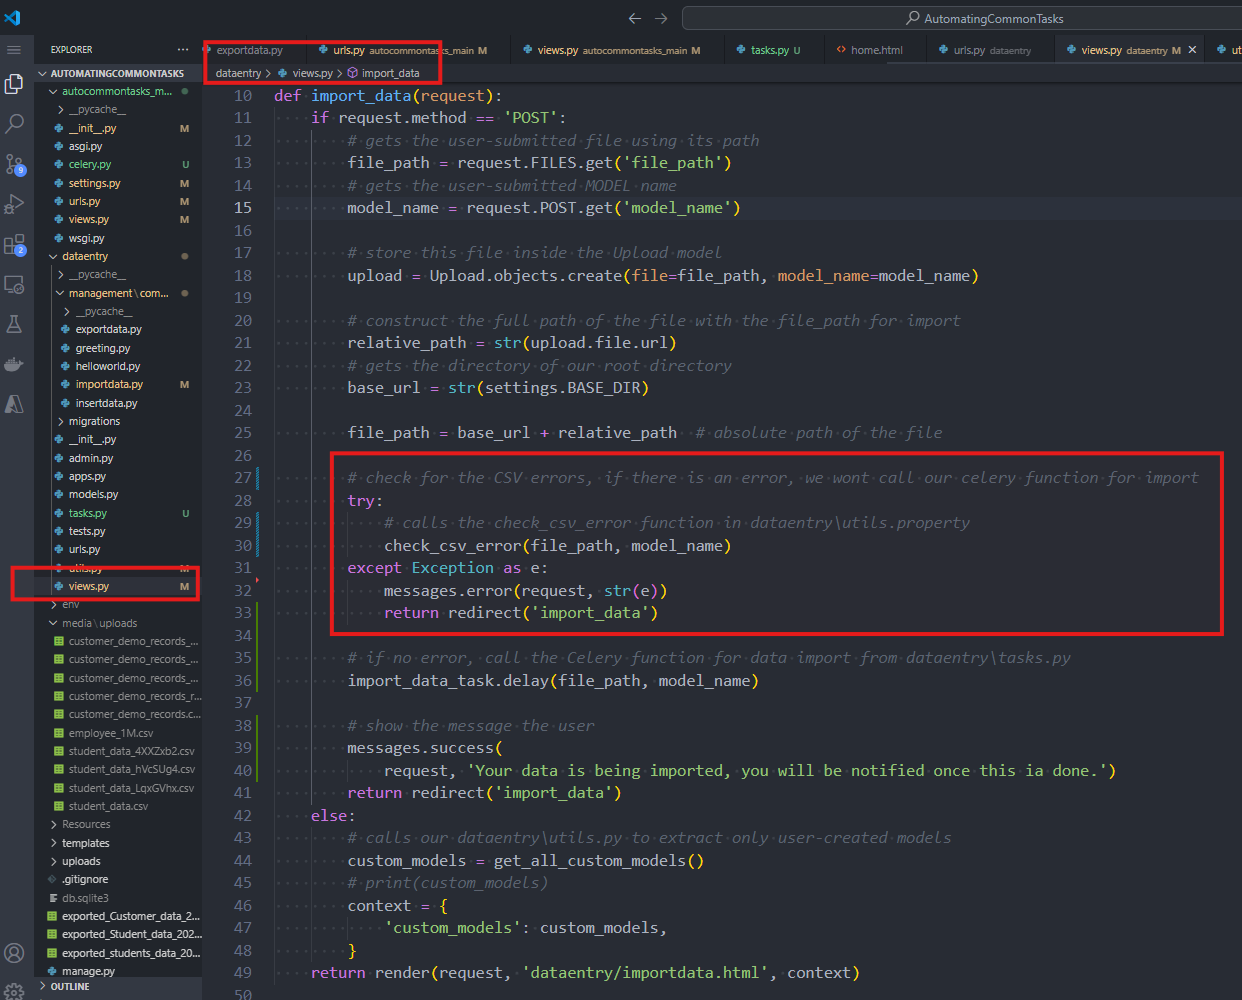
4. In DATAENTRY\VIEWS.PY, we have to update our IMPORT_DATA function, so that the importing part is handled by CELERY instead of by DJANGO.
FROM:
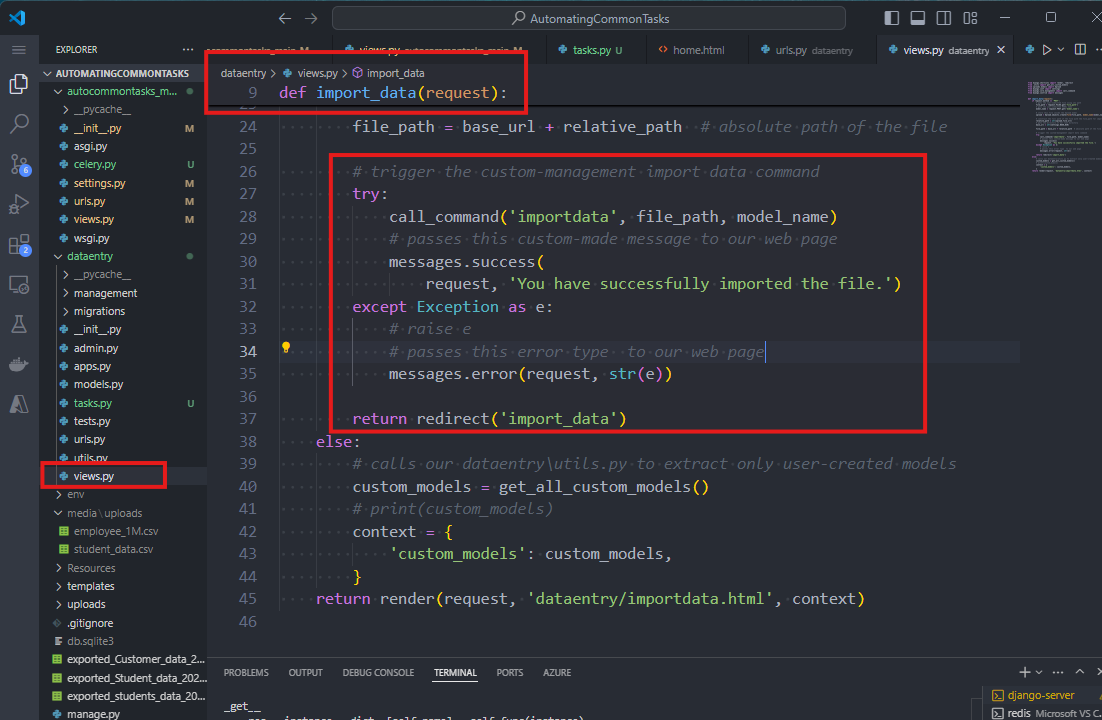
TO:
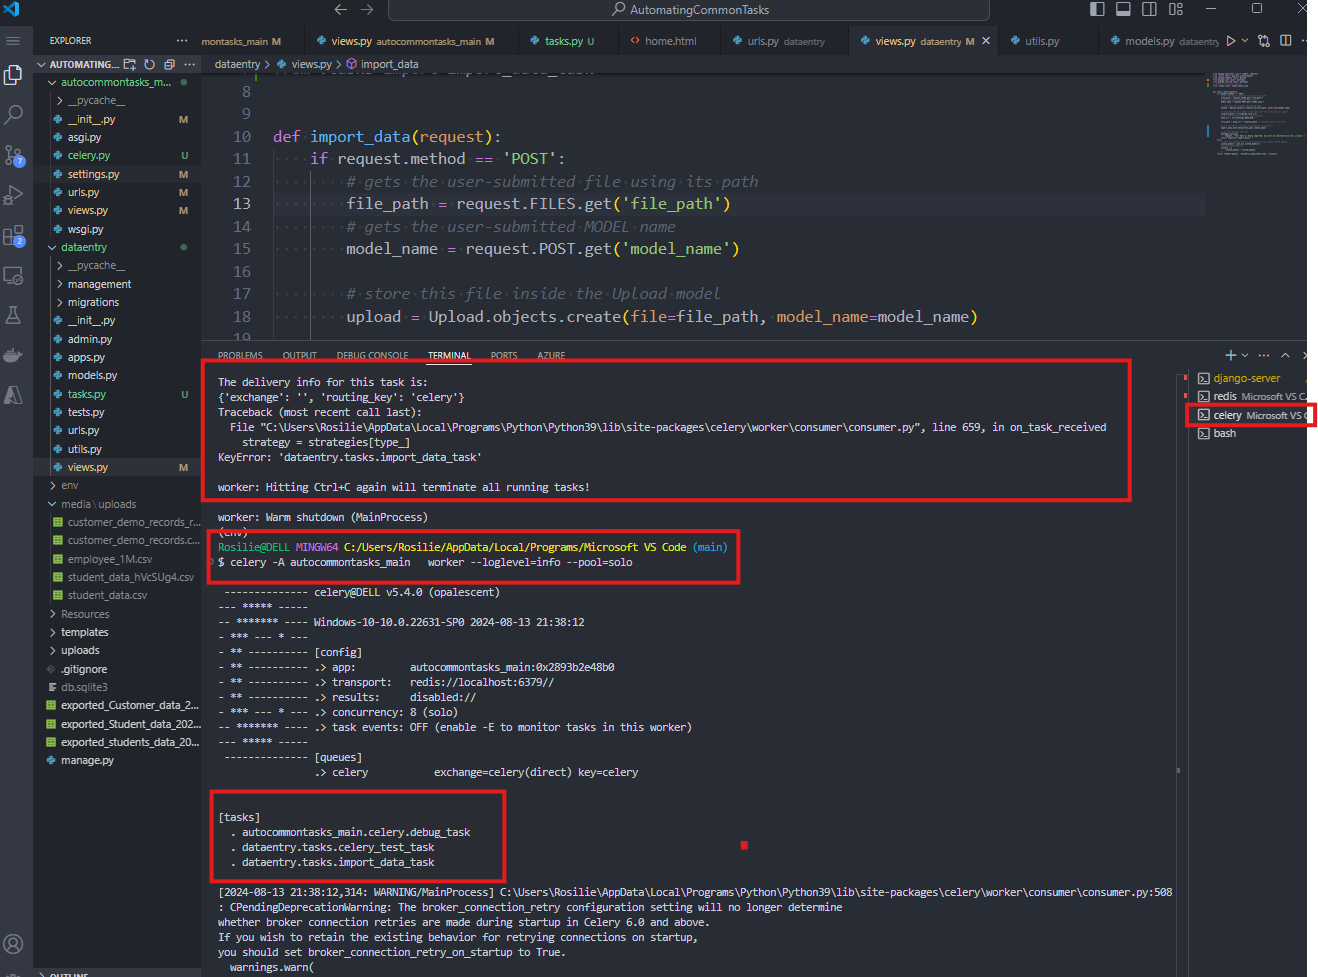
IMPORTANT REMINDER: IF YOU JUST RUN YOUR DJANGO SERVER RIGHT AWAY, YOU WONT SEE ANY UPDATE. THIS IS BECAUSE YOU NEED TO RUN YOUR CELERY COMMAND AGAIN:
$ celery -A autocommontasks_main worker --loglevel=info --pool=solo
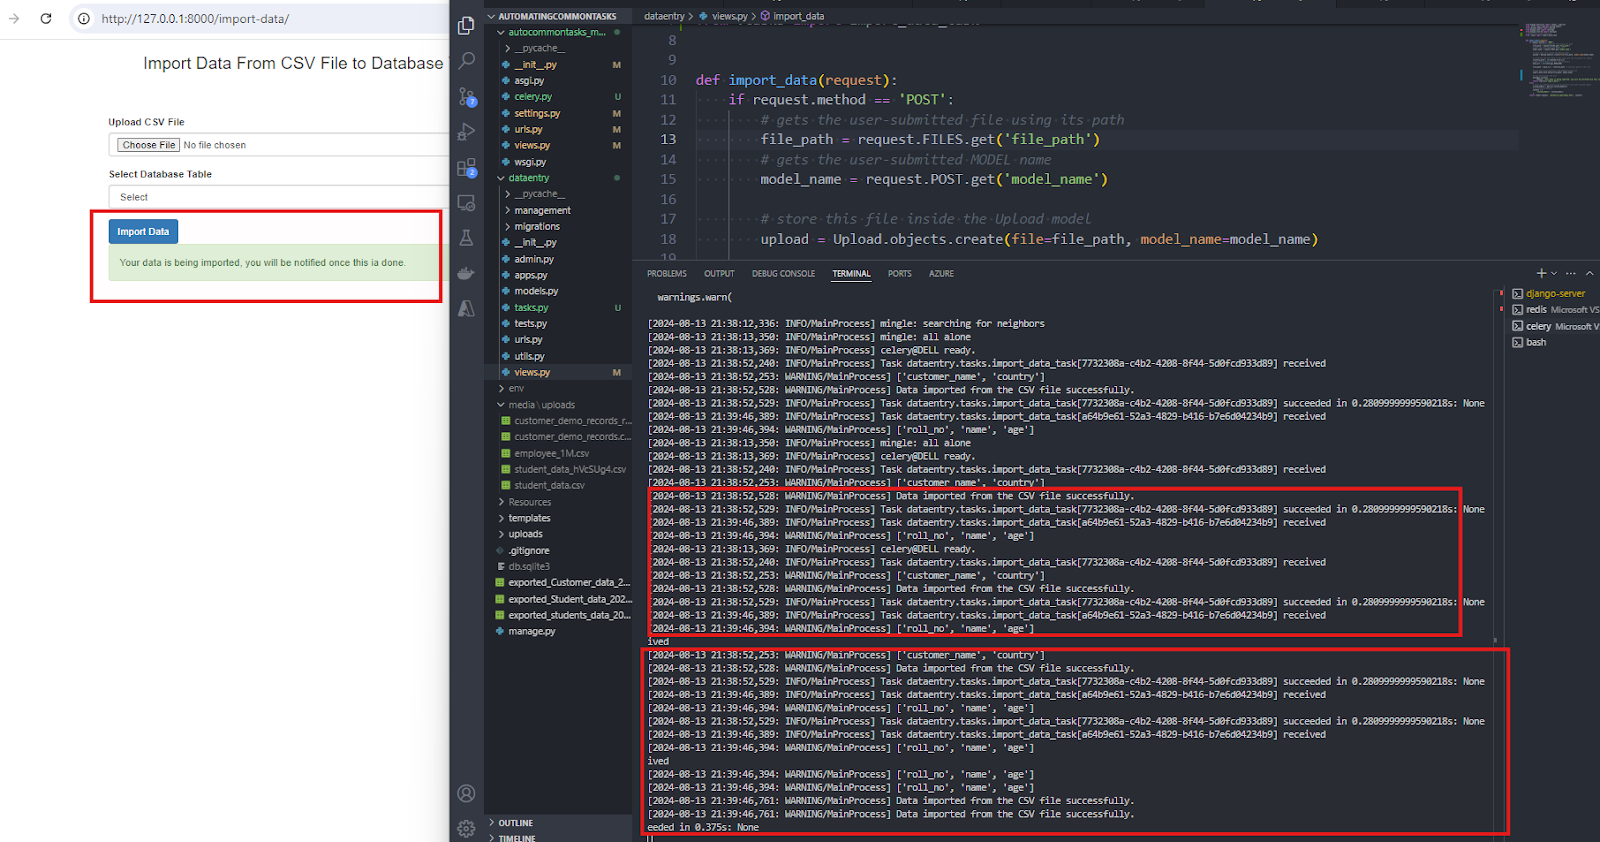
4. When you reload your ADMIN dashboard, you should be able to see the added records from CUSTOMER and STUDENT CSV files.
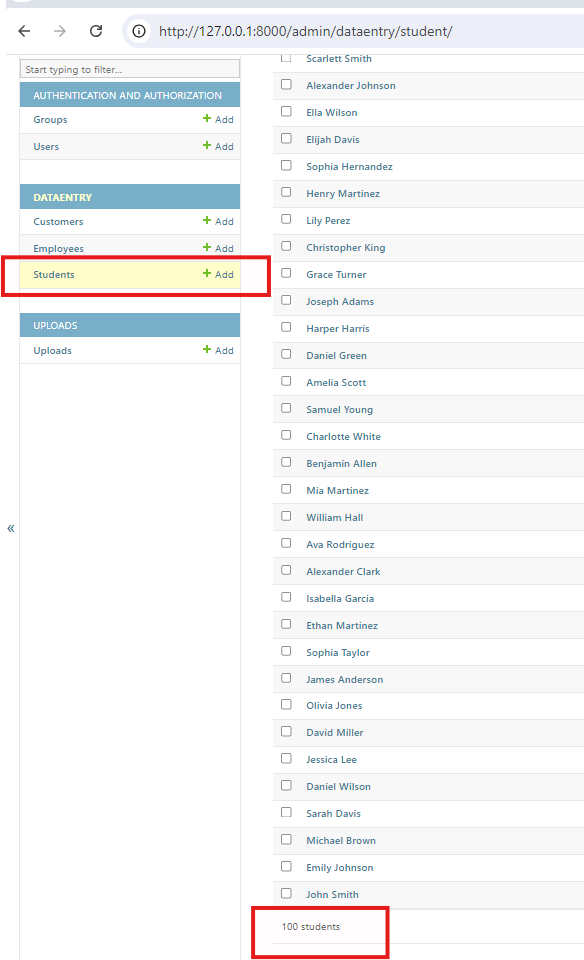
If we need to add a SUCCESS message in our CELERY FUNCTION for an upload of STUDENT CSV file again, we update and run our celery reload command again.
Reloading our ADMIN Dashboard for STUDENT TABLE, IT SHOULD INCREASE IN NUMBER

5. When we try to import a CSV file to an incorrect model, Celery will throw an error but Django won't.
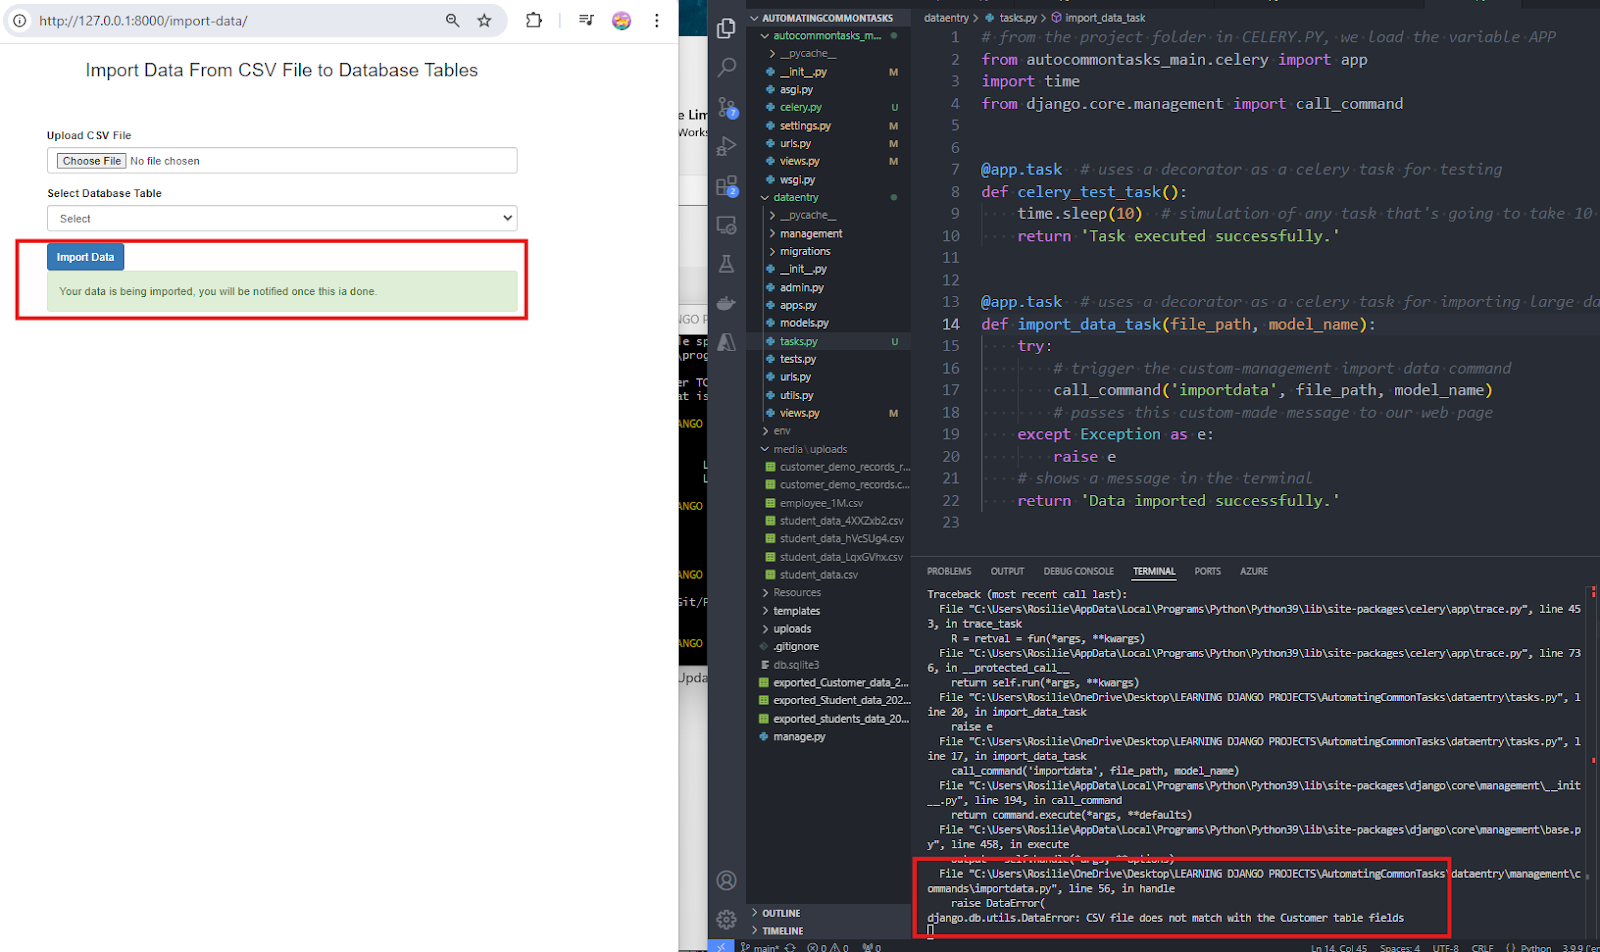
To correct this, we have to an error - handling command BEFORE THE CELERY FUNCTION is being called.
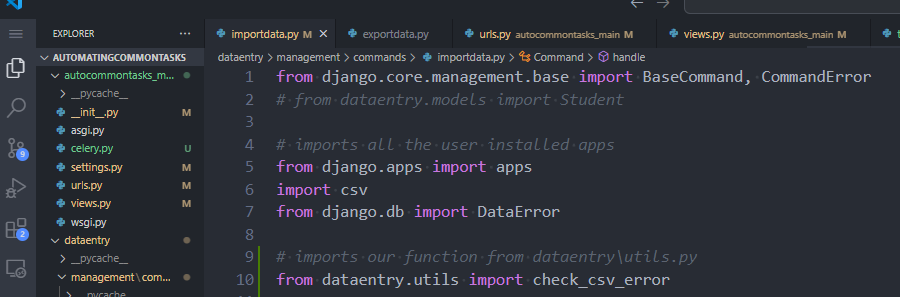
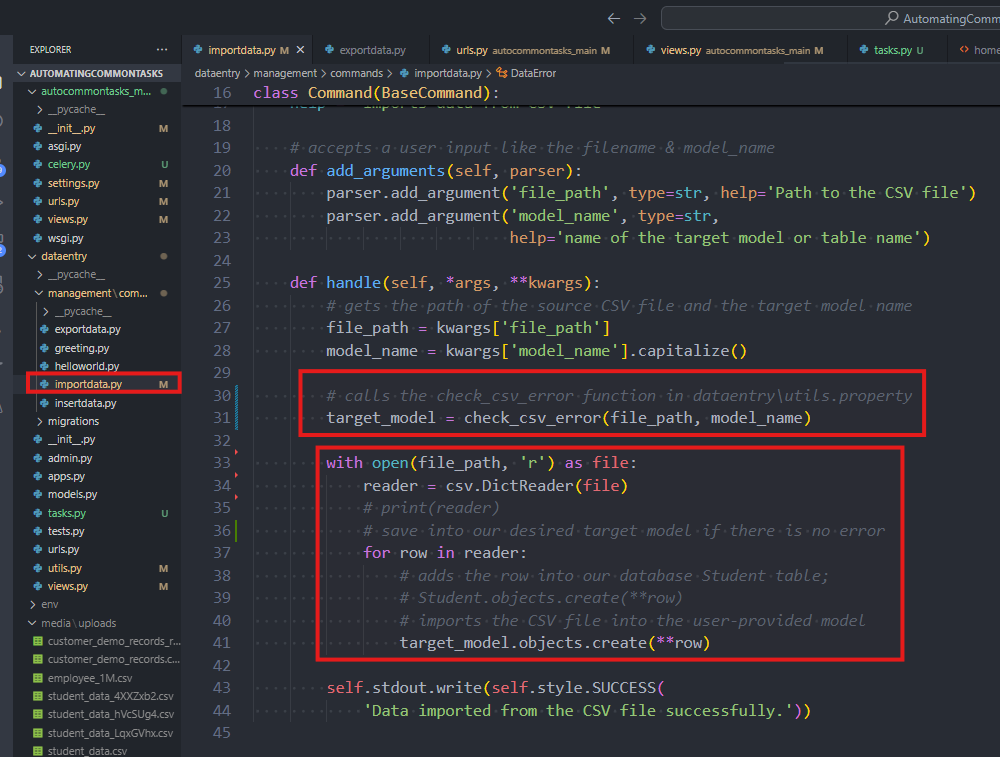
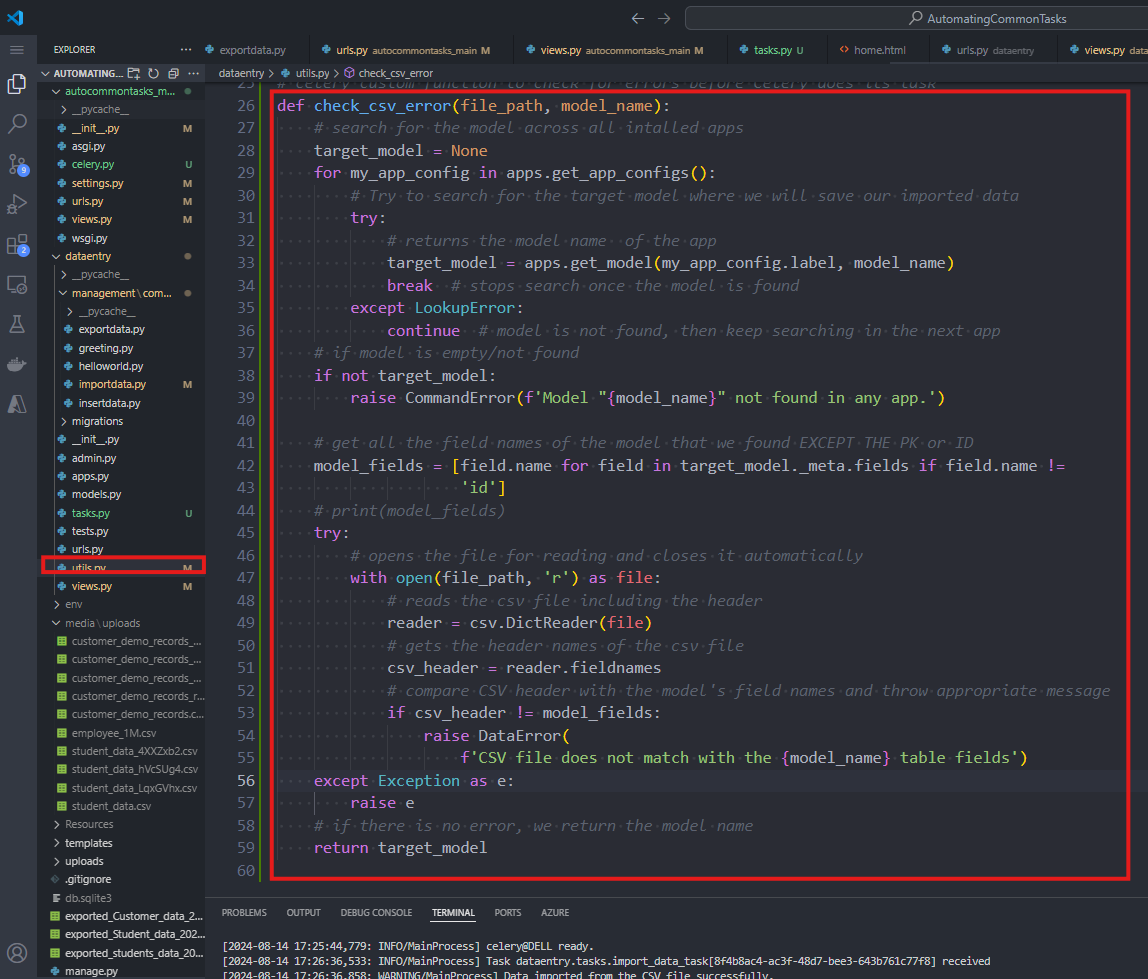
So, go to DATAENTRY\UTILS.PY and move some blocks from MANAGEMENT\COMMANDS\IMPORTDATA.PY. So, our IMPORTDATA.PY updated code now:
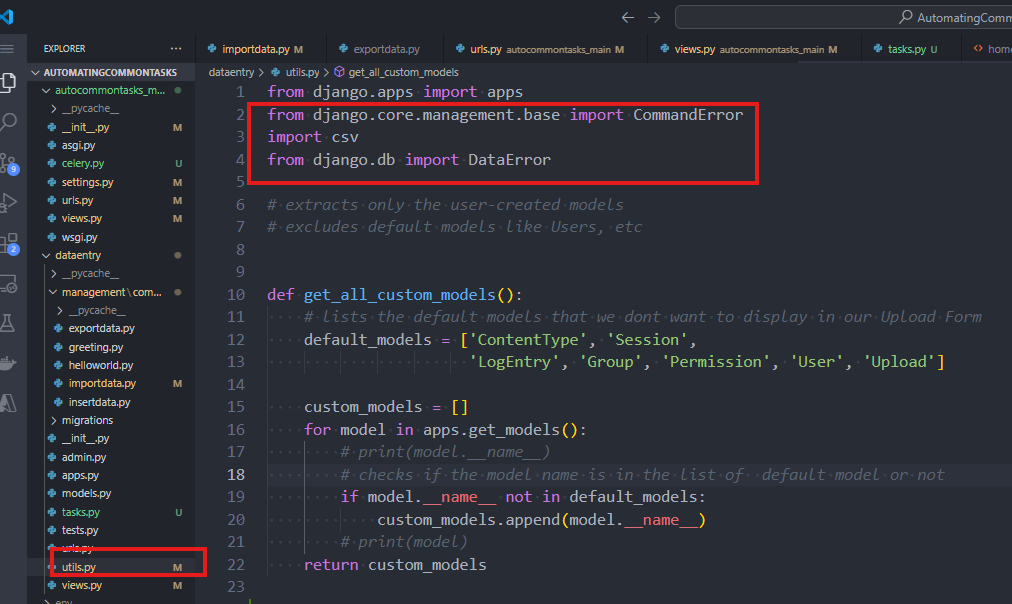
Our UTILS.PY updated code where we created a new function, check_csv_error, to allow Error Handling via UTILS.PY instead from IMPORTDATA.PY
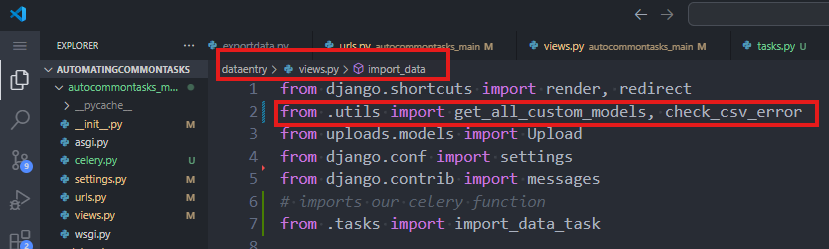
6. We also updated our DATAENTRY\VIEWS.PY to be able to call our error-handling function, check_for_csv,
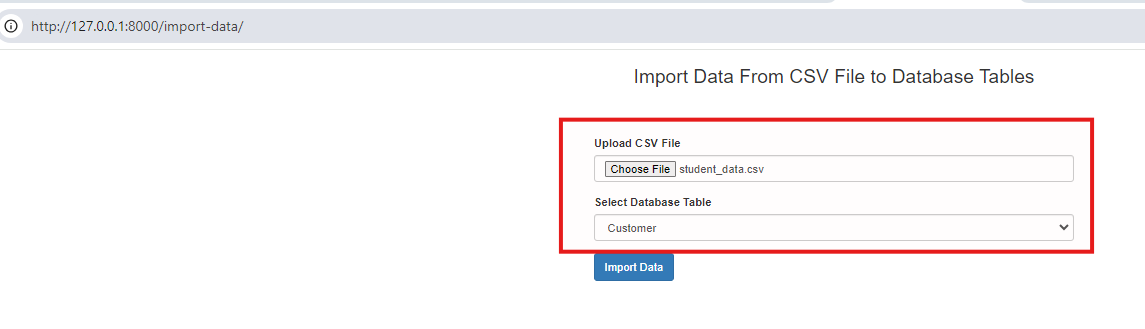
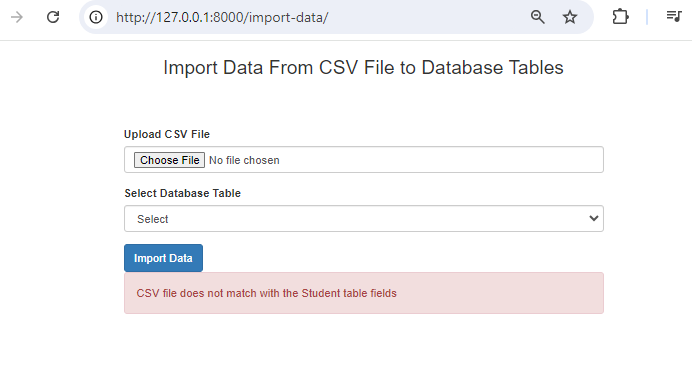
7. Run your Django-server (use $ python manage.py runserver ), Redis (use $ redis-cli ping), Celery (use $ celery -A autocommontasks_main worker --loglevel=info --pool=solo ) and upload Customer to Student Model, we get this user friendly message instead.
8. Now run this with your large data like EMPLOYEE.CSV to employee model. You should be able to see a user-friendly message instead of your webpage just loading for so long.
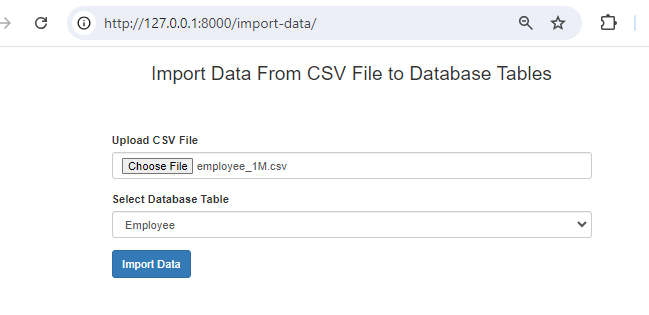
BEFORE UPLOADING:
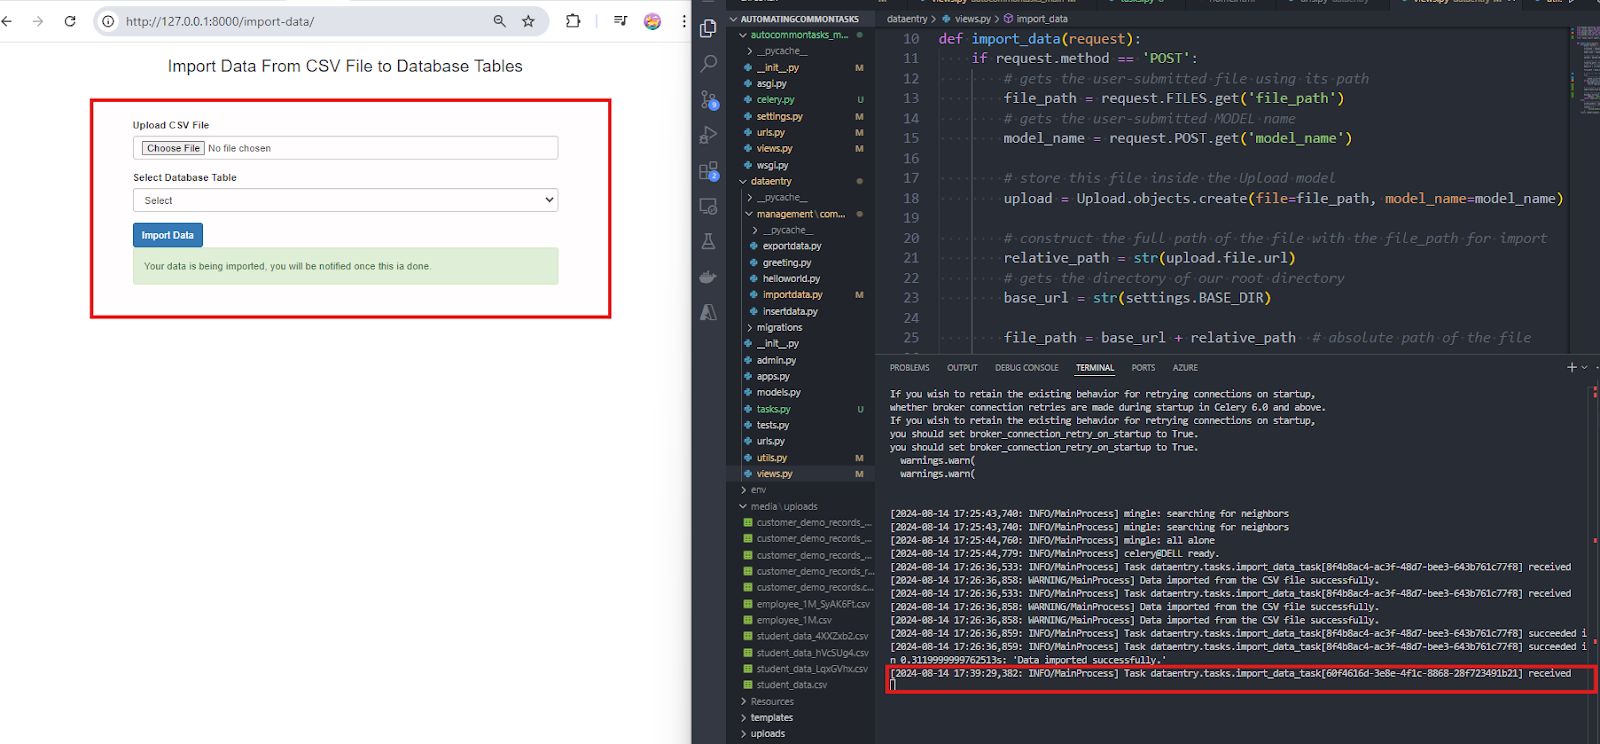
AFTER UPLOADING: Your celery must be able to receive the task request but now the user can do other things since celery handles the time-consuming data importing in the background.
No PDF file attached.